Wednesday, January 11, 2012

Ubuntu TV: Whats all the hype about ?


Ubuntu TV was recently launched at CES 2012, and it created quite some noise among Linux users especially the Ubuntu fan boys like me but Canonical did not release any executable version of the app since it's still in the development phase. So I tried to compile it from source as many other users might have tried out of curiosity. I first checked out http://www.webupd8.org/2012/01/how-to-install-ubuntu-tv-from-ppa.html to build the app but instead referred to the Ubuntu wiki and successfully compiled it. But the downside was that I couldn't run any of the channels. If anyone is still interested in looking at the tutorial of the failed Ubuntu tv.


Install the Ubuntu Tv code and it's dependencies


$ sudo apt-get build-dep unity-2d
$ sudo apt-get install bzr dconf-tools ffmpeg gnome-common libdeclarative-multimedia
$ bzr branch lp:~s-team/ubuntutv/trunk ubuntu-tv
$ cd ubuntu-tv
$ cmake .
$ make
$ cd ..


The bzr code requires you to register at
https://launchpad.net/ubuntu and set up a ssh key. You can read more about it on http://doc.bazaar.canonical.com/bzr.dev/en/tutorials/tutorial.html


       Download and compile the prototype for the Unity video lens system:


$ bzr branch lp:~s-team/ubuntutv/unity-lens-video
$ cd unity-lens-video
$ ./autogen.sh --prefix=/usr --sysconfdir=/etc
$ sudo make install
$ cd ..
$ GSETTINGS_SCHEMA_DIR=ubuntu-tv/data gsettings set com.canonical.Unity2d form-factor tv


If you are on Gnome3, then you do not to use the next step ( it's meant to kill unity2D )


$ killall unity-2d-{panel,places,launcher,spread} && killall unity-2d-{panel,places,launcher,spread}


$ metacity --replace &


Try running the app( may not work, just like in my case)
$ cd ubuntu-tv
$ ./shell/app/unity-2d-shell -opengl


        Here is a screenshot 


        Waiting for some one to find a solution for me at the moment. 


Friday, January 6, 2012

PPAs and Repositories

           There are time many new users to Linux will find that a certain software is not available to them when they try to download it through the terminal.  The only other way to install the app would be to download the .tar files and compile them which in turn is quite a tedious job sometimes.
          Using PPAs and and repositories of other unknown or upcoming software that are not listed on the Software centre. There are many ways to add repositories but the simplest and easiest way is to use the Terminal.
 Suppose you want to add a repository for the FuseEXFAT drivers that are not available in the installation disc of ubuntu due to some patent issues with Microsoft, you will need to add the repository for the drivers manually before you can download and install them.
    To add a repository through the terminal, type the code below on your terminal and type your password when asked.

sudo add-apt-repository ppa:relan/exfat
    Whatever software repository that you are adding from, the lines below would remain the same.
sudo add-apt-repository
    The lines below would vary depending on the developer and it is not difficult to find the ppa codes, all you need to do is a little bit of googling. 
ppa:relan/exfat

 After this step, you only need to update the repository by typing
sudo apt-get update

Finally, install the app or in this case the driver using the normal sudo apt-get install command as usual. In case you want to install the drivers for EXFAT file system on windows the codes are below.
sudo apt-get install fuse-exfat

Thursday, January 5, 2012

Running a Virtual Windows Machine

            Everyone who is on Linux knows that at one point or another we always have to revert to Windows to get things done. There are usually two ways of running Windows on a Linux box; either dual boot  or run it in a Virtual machine. This post will teach you how to run Windows on a Virtual Machine using VirutalBox and a copy of Windows,Mac, or any other device( There are other apps available as well).
           The First step would be to install VirtualBox, you can do this using several ways; the easiest way is to install it from the software centre but for those who want to make use of the command line, type the following on your terminal.


sudo apt-get install virtualbox

          Now start VirtualBox and select the 'New' option available on the upper left side. Select the type of OS that you want to install and name the OS; I managed to install both Mac and Windows on my machine but had to remove the Mac since it hogged a lot of system resources.
 
Select the type of OS and the version

        You can choose whatever amount of RAM, you want your Machine but I recommend at least 1GB if you want to get something productive done like Photoshop.

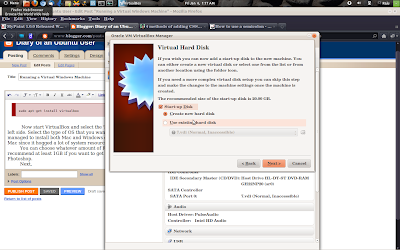
         Next, Choose the new hard disk option and select the hard type of hard drive you want your virtual drive to function as. I suggest using VMDK or VDI since I have had better experience with them. If you are interested in finding out more about what the various types of hard drive options check out http://en.wikipedia.org/wiki/VirtualBox.

         THe next few steps are self explanatory and very easy to manouver around. To start installing your Guest OS on the virtual machine start it and select the iso or the drive that you want to install through and start installing your OS as you would on a normal machine.
Select your iso